
Node Editor
The Node Editor will change its interface for each Node type.
With that said, there are still many elements that will remain the same for all Node types.
Let’s talk about those first, and then I’ll walk you through the interface of each Node type and what each element does for you and your narrative.
Across the top of the Node Editor, we have several buttons. From left to right, let’s discover what each can do for you.
Quick Access
Section titled “Quick Access”This button allows you to quickly insert any items you’ve defined in the Quick Access Modal.
For example, rather than typing character or region names manually over and over (which is extremely error-prone, especially for long or complex names), you can easily define that as an item in the Quick Access Modal and then insert that item in any text field in the Node Editor.
To use this, first use your mouse or keyboard to position the text cursor exactly where you’d like to insert your Quick Access item (within any text field).
Then, simply click Quick Access, then click the item you’d like to insert.
Congratulations! You just learned how to save yourself a lot of time (and mistakes!) typing names, text, common phrases, titles, etc.
Insert Variable
Section titled “Insert Variable”All Variables defined in the Variables Modal will show up in this menu.
In the same way as inserting Quick Access items, simply position your cursor within any field exactly where you want to insert a Variable.
Then, hit the “Insert Variable” button and click the Variable you want to insert at the cursor’s position.
Insert Style
Section titled “Insert Style”The Text Styles you’ve defined in the Text Styles Modal will be listed in this menu, allowing you to easily apply your custom Text Styles to your narrative.
Inserting Text Styles are quite similar to inserting Quick Access items and Variables, with one key difference:
- With Quick Access items and Variables, one snippet of text is being added.
- With Text Styles, two snippets will be added: an open tag and a close tag.
This means that when the Text Style is inserted, if no text has been selected/highlighted, the open and close tag will be inserted at the cursor’s position and the cursor will then be placed between the two tags, ready for you to enter the text you’d like styled.
If text has been selected/highlighted, the open tag will be inserted at the selection’s beginning, and the close tag will be inserted at the selection’s end, thereby applying the Text Style to the selected/highlighted text immediately.
Done and Cancel
Section titled “Done and Cancel”These do pretty much what you’d expect.
It’s worth mentioning though that the changes you make in the Node Editor don’t apply in real-time, which is why both of these buttons exist and why Undo and Redo don’t work in the Node Editor.
The “Done” button will apply your edits to the Node you’re editing then close the Node Editor.
The “Cancel” button will discard all changes made to the Node you’re editing then close the Node Editor.
Node Types
Section titled “Node Types”Now that we’ve learned about the common elements of the Node Editor, let’s learn about the differences between editing each Node type.
Dialog Node
Section titled “Dialog Node”
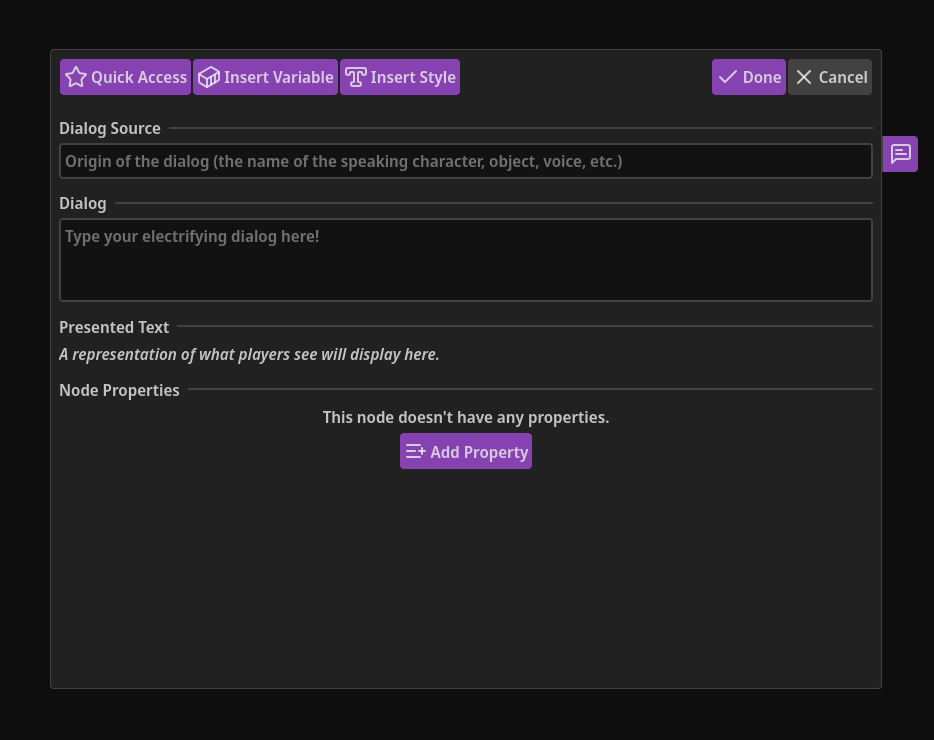
When editing Dialog Nodes, the Node Editor has the following sections:
- Dialog Source
- Dialog
- Presented Text
- Properties (optional)
- Notes (optional)
Dialog Source
Section titled “Dialog Source”You know how when a character is talking in games, their name is often displayed somewhere nearby what they’re saying, indicating to the player who is talking?
This is often seen in RPGs, next to subtitles, dialogue boxes, etc.
The Dialog Source attribute represents this.
Dialog Source isn’t just for characters though.
For example, let’s say you wanted to display a series of dialog boxes as a tutorial.
You could put “Tutorial” or even the name of the concept you’re teaching the player as the Dialog Source.
Dialog
Section titled “Dialog”This can be what a character says, the words in a book, the next part of a tutorial, information on a computer terminal, the description of the next step in a quest, etc.
You can easily add your custom text styles (bold, italic, font-size, colors, etc.) to your dialog by selecting the text you want to style with your mouse, clicking the “Insert Style” button, and clicking the text style you want to insert.
Open and close text style tags will be inserted into your text wherever your cursor is.
You can see a representation of how your text will look to the player directly below the Dialog field in the area labeled “Presented Text”.
Presented Text
Section titled “Presented Text”Just below the Dialog field, you’ll see an area labeled “Presented Text”.
When text is entered into the Dialog field, you’ll see that text show up in this area.
At first, it might seem like there’s no difference between the text in the Dialog field and here, and without variables or text styles, you’re correct.
When you apply text styles to your text in the Dialog field, you’ll see the raw text, including the unsightly text style open and close tags.
This can make it quite difficult to proofread your text, check for punctuation errors, or simply understand what you just wrote.
This is where Presented Text comes in!
NarrativeFlow will automatically parse your text styles and display a representation of what the player will see (i.e. without the text style tags).
If you’ve defined custom CSS rules for a text style, NarrativeFlow will display text within those text style tags with the CSS rules you’ve defined, allowing you to get an accurate representation of how your player could see your narrative in your game.
Properties
Section titled “Properties”Dialog Nodes can optionally have Properties added to them, allowing you to attach data, files, images, etc. to a specific Dialog Node.
For example, let’s say you wanted your game to display a unique interface or image, or perhaps play a VO audio file with a specific Dialog Node, or give a character a specific expression relevant to the dialogue.
Properties are how you accomplish this.
To add a Property, simply click the “Add Property” button at the bottom of the Node Editor.
You can then enter the name of the Property and the value you’d like to associate with that Property name.
TIP
Properties are a powerful way of attaching data, files, etc. to narrative-content Nodes. Learn all about Node Properties here!
To the right of the Node Editor modal, there’s a little purple button with a ‘comment’ icon.
Simply click that button and the Notes panel will expand.
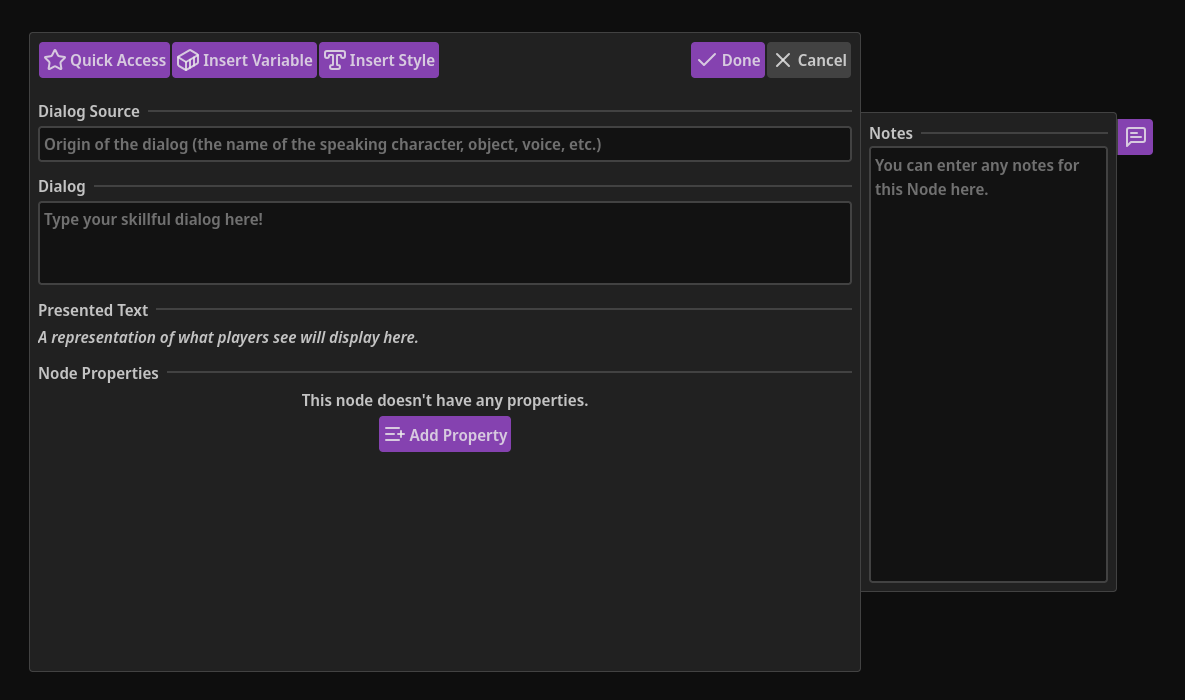
While you can easily write notes in the Experience Notes tab in the Left Panel or in Comment Nodes, you may have some notes specific to a Dialog or Choice Node regarding your narrative.
Thankfully, both Dialog and Choice Nodes allow you to enter any notes you have regarding that specific Node.
Choice Node
Section titled “Choice Node”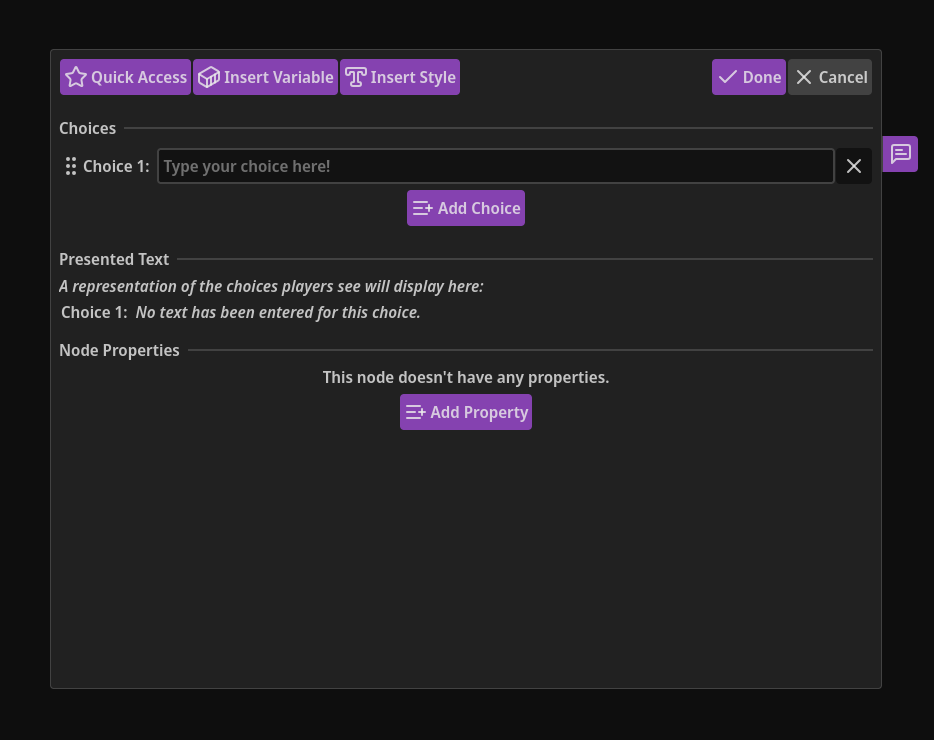
When editing Choice Nodes, the Node Editor has the following sections:
- Choices
- Presented Text
- Properties (optional)
- Notes (optional)
Choices
Section titled “Choices”Choices must have at least one choice, yet can have an unlimited number of choices in them.
Each choice can be presented to your player, and when they select one, the narrative will continue to the Node that choice is linked to.
Like the dialog you write for Dialog Nodes, you can style your choices with custom text styles by positioning your cursor where you’d like to insert a style, clicking the “Insert Style” button at the top of the Node Editor, then clicking the text style you’d like to insert.
Just below the Choices section, you’ll see the Presented Text section, which displays your choices with all Text Styles parsed.
TIP
Your choices don’t have to be limited to a text-based UI.
For example, let’s say you want to show the player an entirely non-text-based interface, or they could even just be interacting with the world.
In your game engine, each “interactible” element in your interface/world scene would be tied to a different choice in your Choice Node.
Then, when the player interacts with something, your game engine will continue through the narrative flow from that choice.
Presented Text
Section titled “Presented Text”Just below the Choices section, you’ll see a section labeled “Presented Text”. When text is entered into your choice’s fields, you’ll see that text show up in this area.
At first, it might seem like there’s no difference between the text in the Choice field and here, and without text styles, you’re correct.
When you apply text styles to your choices though, you’ll see the raw text, including the unsightly text style open and close tags.
This can make it difficult to proofread your text, check for punctuation errors, or simply understand what you just wrote.
This is where Presented Text comes in!
NarrativeFlow will automatically parse your Text Styles and display a representation of what the player will see (i.e. without the text style tags).
If you’ve defined custom CSS rules for a text style, NarrativeFlow will display text within those text style tags with the CSS rules you’ve defined, allowing you to get an accurate representation of how your player could see your narrative in your game.
Properties
Section titled “Properties”Exactly like Dialog Nodes, Choice Nodes can optionally have Properties added to them, allowing you to associate data, files, images, etc. with a specific Choice Node.
For example, let’s say you wanted your game to display a unique interface, use a unique font, or play a unique sound with a specific Choice Node. Properties allow you to do this easily.
To add a Property, simply click the “Add Property” button at the bottom of the Node Editor.
You can then enter the name of the Property and the value you’d like to associate with that Property name.
TIP
Properties are a powerful way of attaching data, files, etc. to narrative-content Nodes. Learn all about Node Properties here!
To the right of the Node Editor, there’s a little purple button with a ‘comment’ icon. Simply click that button and the Notes panel will expand.
While you can easily write notes in the Experience Notes tab in the Left Panel or in Comment Nodes, you may have some notes specific to a Choice Node regarding your narrative.
Thankfully, both Dialog and Choice Nodes allow you to enter any notes you have regarding that specific Node.
Start Node
Section titled “Start Node”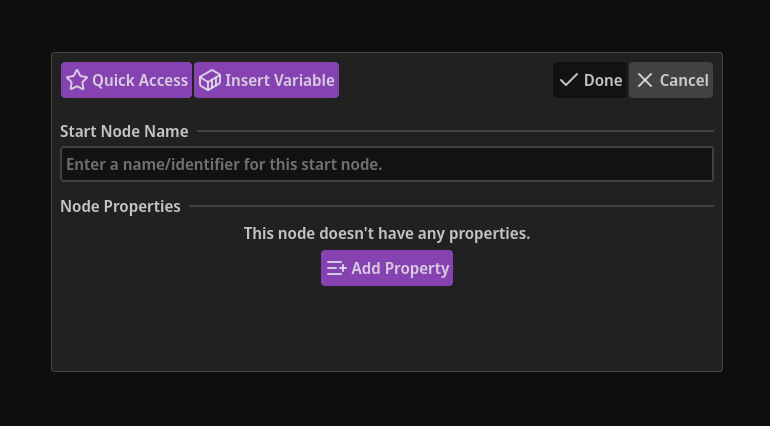
When editing Start Nodes, the Node Editor will have the following sections:
- Name
- Properties (optional)
Every Start Node in an Experience must have a unique name (though Start Nodes in different Experiences can have the same name).
This name is how you tell your game engine where to go to start a narrative chain.
For example, let’s say you want some narrative for when the player talks with a shop owner.
You could give the Start Node of that chain the name “Talk To Shop Owner”.
Then, in your game engine, when the player talks to the shop owner, you’d simply use that name to start the right narrative chain.
You can learn more about how Start Nodes and everything else works with your game engine here: Using NarrativeFlow With Your Game Engine.
Properties
Section titled “Properties”Start Nodes can also optionally have Properties added to them, allowing you to attach data, files, images, etc. to a specific Start Node.
For example, let’s say you wanted a specific Experience or part of your narrative to display with a unique interface, or you wanted to trigger a specific camera angle or change something in your scene when a narrative chain starts.
Properties on Start Nodes are a great way to do this.
To add a Property, simply click the “Add Property” button at the bottom of the Node Editor.
You can then enter the name of the Property and the value you’d like to associate with that Property name.
TIP
Properties are a powerful way of attaching data, files, etc. to narrative-content Nodes. Learn all about Node Properties here!
End Node
Section titled “End Node”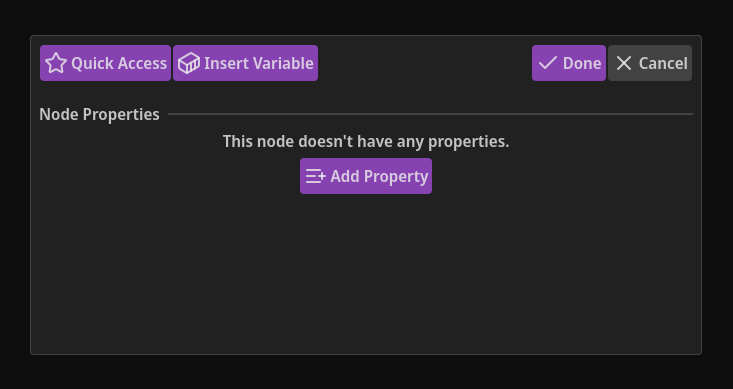
End Nodes are the last Node in a chain and tell your game engine that the end of a narrative chain was reached, allowing it to react accordingly.
When editing End Nodes, the Node Editor has just one section:
- Properties (optional)
Properties
Section titled “Properties”End Nodes can also optionally have Properties added to them, allowing you to attach data, files, images, etc. to a specific End Node.
This can be especially useful if you have different “endings” to a narrative chain.
For example, let’s say you have two different End Nodes for a specific chain.
Which End Node is reached depends on choices the player selects, conditionals, etc.
You want your game to do something different depending on which End Node is reached, such as start a cutscene, change to a different camera angle, play a sound, change to a different level/scene, etc.
Properties on End Nodes are an easy way to accomplish this.
To add a Property, simply click the “Add Property” button at the bottom of the Node Editor.
You can then enter the name of the Property and the value you’d like to associate with that Property name.
TIP
Properties are a powerful way of attaching data, files, etc. to narrative-content Nodes. Learn all about Node Properties here!
Variable Node
Section titled “Variable Node”
There’s just one section in the Node Editor when editing Variable Nodes:
- Assignments
Assignments
Section titled “Assignments”Each Assignment has an “Assignment Type” selector.
Under that is the Variable and Value fields, separated by the assignment type operator selected above.
For example, let’s say the + Assignment Type (operator) has been selected, and you’ve entered Player's Reputation as the Variable, and 20 as the Value.
As you’d suspect, this would add 20 to the player’s reputation.
The Value field isn’t limited to just static text or numbers.
You can also insert variables in the Value field, and the value associated with that variable at runtime will be used instead for the assignment.
Conditional Node
Section titled “Conditional Node”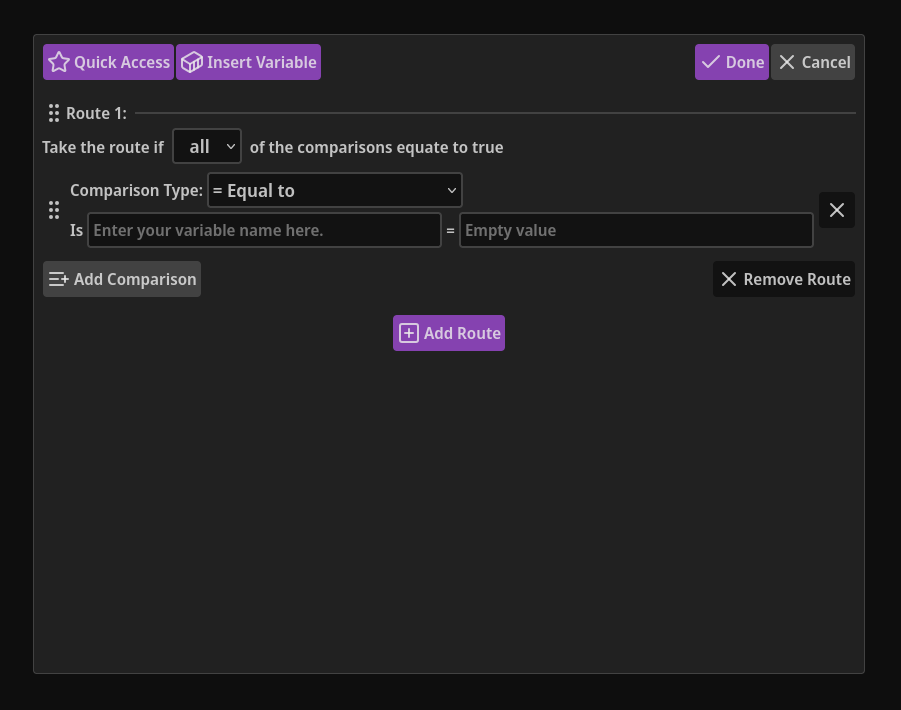
Conditional Nodes have the following sections when open in the Node Editor:
- Routes
- Mode
- Comparisons
Routes
Section titled “Routes”Each route can have as many comparisons as you need, and you can create as many routes as you want.
Whether a route is taken or not is determined by a combination of the comparisons and the mode of the route.
From first to last, the first route that has all, any, or none (i.e. the mode selected) of the comparisons equate as “true” will be taken by the narrative flow.
Route Mode
Section titled “Route Mode”A route can have one of the following modes:
- All - route will be taken if ALL of the comparisons equate to true
- Any - route will be taken if ANY of the comparisons equate to true
- None - route will be taken if NONE of the comparisons equate to true
Comparisons
Section titled “Comparisons”Each comparison consists of a variable, an operator (equal to, less than, greater than, etc.), and a value.
Let’s use the following example: Reputation > 30.
If this is the only comparison in a route, the route’s mode is set to all or any, and Reputation is currently greater than 30, than that comparison equates as true and that route will be taken.
If the route’s mode was set to none, then the route would not be taken.
If no route is considered valid, the default route will be taken.
The “value” part of comparisons doesn’t have to be limited to static numbers or text. You can compare variables to other variables.
For example, you could have characters say something special on the player-character’s birthday (think Stardew Valley) by using a comparison like this: Player's birthday = Current day.
Or in this example: Can Player Access Special Dialogue = Did Player Choose ___, perhaps there is special narrative that the player can only experience if they made a specific choice elsewhere in your story/game.
You could also easily have special dialogue for the first time the player meets a character: Has Player Met Evelyn = No.
Probability Node
Section titled “Probability Node”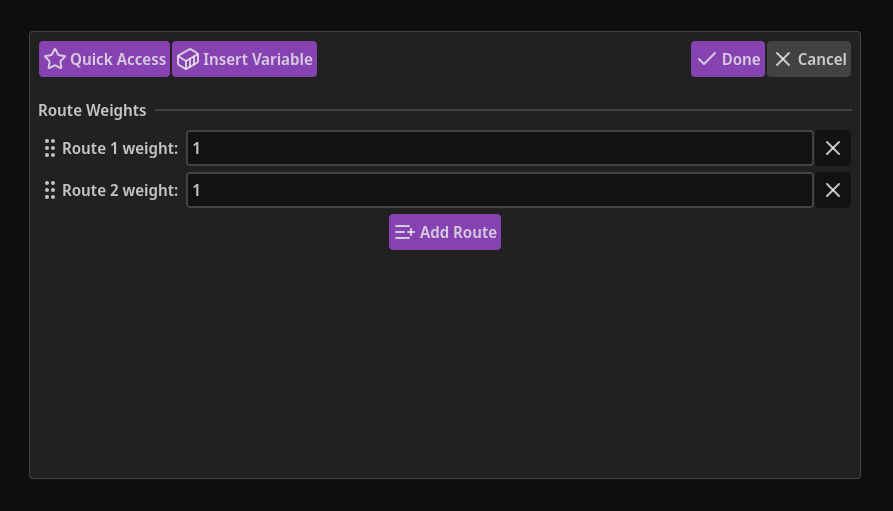
When editing Probability Nodes, there’s just one section in the Node Editor:
- Routes
Routes
Section titled “Routes”Thankfully, routes in Probability Nodes are much less complex than Conditional Nodes.
If you’d like to have some weighted randomness in your narrative where certain branches have a higher, lower, or equal chance of being taken, then the Probability Node is perfect for this.
For example, let’s say you have two branches in your narrative. One branch you’d like to be taken most of the time, with the second taken rarely.
You can easily accomplish this by, for example, setting the weight of the first route to 20, and the second route to 1.
You can also use variables you’ve defined as a route’s weight, and the real-time value of that variable will be used to determine which route is taken.
Function Node
Section titled “Function Node”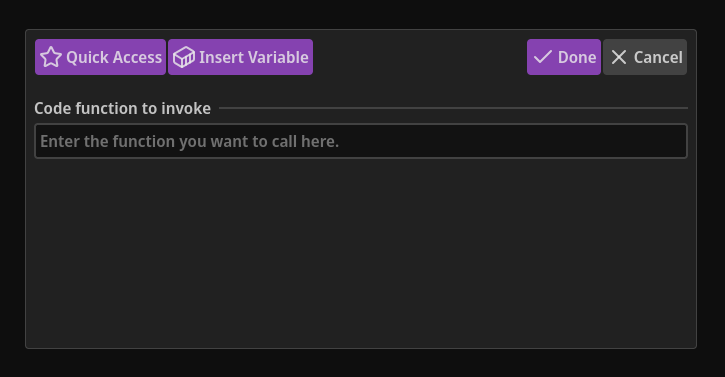
Let’s say you needed to run a specific function, method, etc. in your game engine in the middle of your narrative chain.
For example, to change scenes, spawn an object, calculate something, etc.
The Function Node is the easiest way to do this.
This node signals to your game engine to do something. That “something” is defined by you in your game engine and is determined by what you enter into the Statement field.
The Function Node just has one section in the Node Editor:
- Statement (labeled “Code function to invoke)
Statement
Section titled “Statement”This statement will be passed to your game engine exactly as you’ve typed it.
You can also insert any Variables you’ve defined in the Variables Modal.
Any Variables that you insert will be parsed at runtime right before the statement is passed to your game engine.
For example, let’s say you’ve defined a Variable called [Player's Reputation], and it currently has a value of 15.
If you’re Statement was CalculateSomethingBasedOnReputation: [Player's Reputation], the text/string that your game engine would receive would be:
CalculateSomethingBasedOnReputation: 15.
Teleport Node
Section titled “Teleport Node”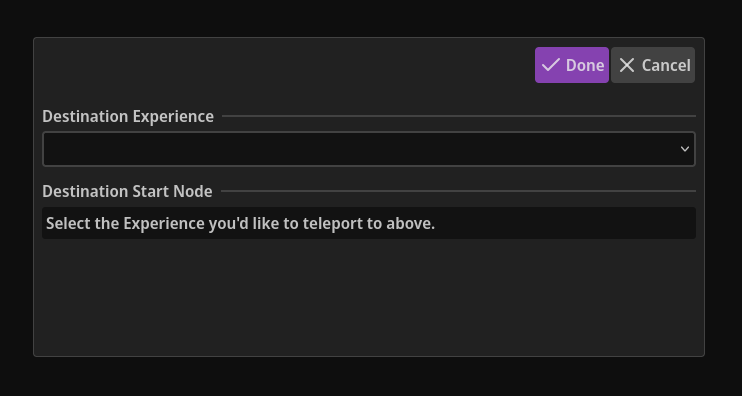
Teleport Nodes have two sections when opened in the Node Editor:
- Destination Experience
- Destination Start Node
Destination Experience
Section titled “Destination Experience”This selector allows you to chose which Experience you’d like to jump/teleport to when this Teleport Node is reached by your game engine.
The Destination Experience can be any Experience in your project, including the Experience that the Teleport Node is currently in.
Destination Start Node
Section titled “Destination Start Node”The Start Node chosen here will be the exact Start Node that your game engine will be “teleported” to when a Teleport Node is encountered in your narrative.
If there are any Start Nodes with unique names in the chosen Destination Experience, they’ll appear in this selector.
Start Nodes without a name won’t be listed, so if you don’t see the Start Node you’re looking for, check if it has a unique name.
Connector and Comment Nodes
Section titled “Connector and Comment Nodes”The Connector and Comment Node types can’t be opened in the Node Editor and are modified simply by interacting with the Connector or Comment Node itself.